Wednesday, June 2, 2010

Shirt for My Little Fellow


I don't have too much to say about this pattern, Burda 9593, but all of it is good. A very nice basic shirt pattern for boys in sizes 6 through 12, with pocket and yoke options. I carried this pattern home from work at the House of Fabrics because it has a collar with a stand and a double yoke. It has recently been discontinued.

The fabric is a lovely bottom-weight twill cotton from Anne Klein. It's somewhat too heavy for a shirt, but I wanted to experiment to see if it would hold up better to the abuse it will receive. Interfacing is fusible Pro-Tailor Deluxe from Sew Exciting.

The whole thing went together very easily and well. I much prefer constructing the collar with a stand over a convertible collar, even though the latter is considered the simpler option.

Wednesday, May 26, 2010

Instant Shoulders--Just Add Silk Organza


Here we have Simplicity 2501, a fitted blouse with a set-in waistband and a peplum. How I love a peplum! Even though it's quite an odd word, peplum. Odd or not, I think it's the ultimate sway-back fitting solution.

This is one of Simplicity's patterns with cup sizes. I could rhapsodize about that, too. A great public service, the patterns with B-C-D cup size pattern pieces included.
Even though they may be just a tiny bit extreme, the sleeves certainly do add a lot of volume to my underwhelming shoulders. Mostly to help the **five** tucks in each sleeve to hold their shape through a day of wear, I decided to try underlining the sleeves with silk organza. I wasn't counting on quite so much puff, but what the heck. The other advantage to this strategy was that I was able to hem the sleeves by hand, catching the underlining, for a beautiful hem finish with no visible line of stitching. Binding the armscye seam in bias tape became a necessity, as a serger seam finish would not have totally mitigated the itch of the scratchy organza.

Another simple change I made was to self-line the peplum rather than turning a narrow hem. I had plenty of fabric, and I thought that adding more body to the lower section would improve the hang of the peplum around the hips. If you want to do the same, cut out two sets of peplum pieces, join each set at the side seams (so that you now have two peplums), sew them right sides together, turn and press. I topstitched 1/4" from the edge to make future ironing easier.

Finally, inspired by Gertie, I created a convertible collar rather than any of the lame collars provided by Simplicity. I loved Gertie's tutorial, but decided I wanted both an upper and an under collar rather than a folded collar piece. I found a collar on a vintage Simplicity pattern that looked right, but was much too short. I cut it apart at the center back fold and added five inches to match the measurement of the neck edge seamline on this blouse. It worked out very well, if I do say so myself!


Monday, April 19, 2010

Luckiest Girl in the World


That's me today, because I have a genuine vintage Vogue Patterns cabinet! Ah, Craigslist, you have been good to me before, but this $20 find takes the cake. Even though my long-suffering husband had to drive me to the back side of beyond to get this (as the seller was giving directions, he said, "Now here's where it's helpful to have a four wheel drive truck"--how fortunate that we do), and even though wrestling it into my sewing room closet was extremely difficult and even though I had to reorganize all my precious closet stuffings, I am completely thrilled.

The Vogue Pattern Company of years gone by was no slouch when it came to specifying a cabinet. The action on these drawers is smooth. Now I can thumb through my patterns with the greatest of ease.


And don't worry--only two of these drawers hold patterns. I do have a goodly collection, but not five drawers worth. The top drawer has leather, the next is interfacing (what heaven to have a good place for it!), then patterns, then gifts and sewing machine repair stuff.

In actual sewing news, I am so pleased to show you this blanket. The sixties-era wool was a $6 yard sale purchase, and the similar-vintage butterfly print came from the sale of a fabric collector, Lisa Shoemaker. I love the two together so much. I know that binding a blanket in cotton isn't the typical choice, but really, why not? This binding tutorial from Crazy Mom Quilts tells you nearly everything you need to know about how to make a binding. I wanted to see as much of the butterfly print as possible, so I cut a 6" cross grain binding for a finished binding width of 1 1/2".


I get that quilters favor handstitching the binding on the back side, but I don't totally understand why. This three-step zigzag looks good to me.

Wednesday, April 7, 2010

A Wee Green Machine


She's really not wee at all. She's a hulking chunk of nearly solid metal. And she sews with all the solidity one might expect from an almost-50-pound-supposedly-portable machine.

My SuperFriend McKenna Linn could not face lugging this sewing machine through an upcoming move (she has a couple hundred other vintage beauties to relocate). So she looked around for an adoptive home...there I was!


McKenna had found this machine in a thrift store, but hadn't done any work on it before passing it along to me. When it arrived at my house, the handwheel wouldn't turn, but everything looked very clean. Ah, the needle was striking the needle plate. The needle was inserted incorrectly and was bent almost 1/4" to the front!

Then I discovered that the hook had been broken and repaired with Superglue. Imagine.

I borrowed a hook from another machine (it is the Singer 15-class type) and we were almost in business.


The tension was and remains a bit of a challenge. It was simply spinning around and around in its socket. I managed to fix it up for a while, but it's now gotten out of whack again and the thread is jumping out of the top hook on the tension assembly. I think maybe I don't have the wire loop in the proper position.

The machine has a wonderful 1.5 amp motor. Lots of power, but even better, very smooth. It takes standard low shank feet. I quickly got tired of moving the low shank snap-on adapter between this machine and my Juki to allow those two to share my collection of snap-on feet, so I purchased a generic low shank snap on adapter from Gone Sewing, an eBay seller.

This is a left needle position machine. I have two other left needle machines, my Necchi BU and Universal Deluxe, but those are high shank. Left needle means that, when set for straight stitch, the needle is in the left half of the slot in the needle plate where the needle goes down to interact with the bobbin. The needle position is not adjustable on this machine. Presser foot pressure is fully adjustable with the common push-button, pop-up assembly. There are two nice spool pins and two thread guides (nice!). But the machine doesn't do parallel rows of stitches even with a double needle (such as you would use on a hem for knits), since it is the older needle arrangement with the eye facing to the side.

The stitches on offer are straight stitch, zigzag and blind hem. The machine takes cams, but arrived here with only one on board. The chances of finding compatible cams seem low, but who knows? They are a top hat design, in light sage green.

Consew is known as an industrial name, and I haven't yet found other examples of a Consew-branded domestic. Do you know of any?

Monday, March 29, 2010

A Very Fine New Tool


I present...the Tandy Round Hole Punch!

Attaching leather straps to leather bags is a bulky undertaking, and I've been inspecting bags and photos of bags to see how the industry gets such a nice finish. Answer: lots of ways. But rivets are one, so I invested in a hole punch, a set of Rapid Rivets, and a rivet setter. Believe me, every one of these elements is completely necessary. You also need a pounding surface (in my case, a block of scrap wood) and a mallet. A hammer would really be too rigid for this purpose; a rubber, plastic or (best of all) leather mallet is needed.


The size 2 (1/8") hole punch seems to be a perfect fit for the small size of Rapid Rivets. It was also terribly helpful for installing purse feet through a layer of leather and a bag bottom.


The finished article, a leather version of Amy Butler's Swing Bag, lined in Techno Taffeta by Vera Wang.

Thursday, March 25, 2010

I Match My Sewing Room Curtains


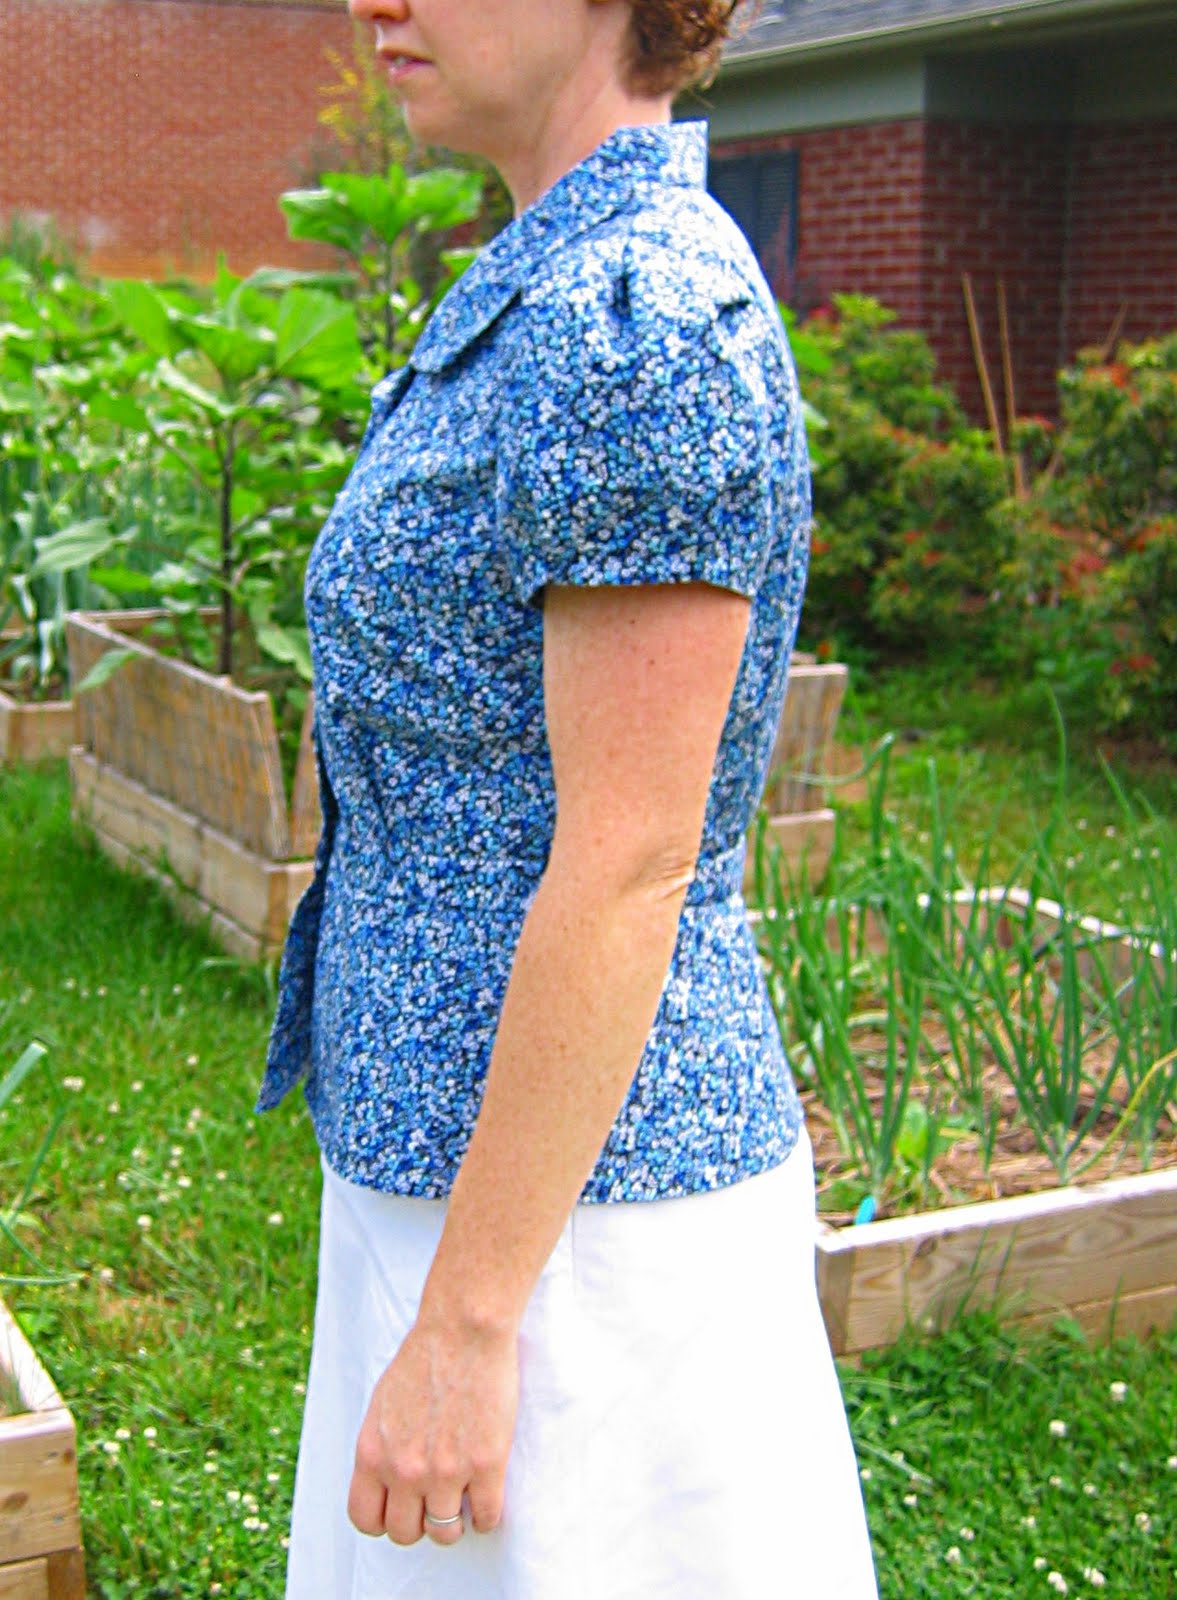
This beautiful silk from the 1960s proved somewhat difficult to use. It had quite a noticeable fade line in the middle of the 44" wide yardage from being stored on a bolt for fifty years. The gathered curtains in my sewing room were one good use, and I think this blouse has turned out to be another.

In this second rendition of Simplicity 2599, I still haven't gotten the sizing quite right. I did a 1/2" petite adjustment between the shoulder and the bottom of the armhole (and then forgot to make the corresponding adjustment to the sleeve!), but it's still a bit too big in the neck and shoulders. I believe this is a size 10 with the C cup front. Crazy, since the bust measurement for the 10 is 31 1/2 inches. My high bust is right at that measurement, so there really is no good reason for it to still be so roomy, especially with the length adjustment. But down to an eight I go on the next pass.

I put in both center front and center back seams to avoid the fade line in the center of the yardage (and to allow for a sway back adjustment in the back), and I replaced the neck facing specified by the pattern with a bias binding that extends to make a tie in front. Another change, and one which I do heartily recommend, was to cut four sleeves so that each tiny sleeve could be fully lined. On these short little sleeves, the hem and sleeve seam are often visible when the garment is worn. So much nicer to have a finished right side of the fabric showing than the underside of a hem and a sleeve seam.

Naturally I didn't think to take step-by-step photos of the sleeve construction, but if you aren't familiar with this procedure, here is what I did:

1. Stitch the lower edge of two sleeves together with right sides facing one another.
2. Press the seam allowances toward whichever sleeve you designate as the lining or undersleeve.
3. Understitch the seam allowances toward the undersleeve.
4. With right sides facing, stitch the sleeve into a tube (or, said another way, stitch the underarm seam).
5. Fold the sleeve so that the wrong sides are together and all seams are enclosed.
6. Baste the seam allowances for the armscye seam together.
7. Stitch sleeve into armscye (after sewing side seams).
8. Finish armscye seam with a serger or with bias binding. Or sew a French seam, which I don't know how to do on an armhole and intend to learn!

My apologies for the blurry pictures! I believe the fault lies with both the photographer (me, using a tripod) and her aging Canon Powershot A80. The screen is so tiny on this camera that I never know what I've taken until I download the shots into the computer. And by then it's too late to get re-dressed and go back for more.

Monday, February 15, 2010

Jalie Coat Unveiled


Gosh, the whole drama of the fitting of this coat, when it really heated up, played out over on PatternReview's message boards and didn't make the blog at all. Now I find I just can't bring myself to bring things up to date by adding photos of the saggy, draggy, wrinkly effect of the sleeves as they were drafted. On me. On others, and in another fabric, perhaps they are fine.


But thanks to PatternReview members, most especially Belinda, aka sew4fun, I am able to report that it all worked out in the end. Generally I am tragically stingy when it comes to fabric, but I happened to have three yards of this gorgeous cashmere. At first it looked as though my mother, the prowling rug hooker, was going to make out big with a whole yard of my extra fabric. But no! I had to cut new sleeves. And then I nixed the hood, so I had to cut a collar. Not so much left for rugs now, but I can't say I feel too guilty.

And cashmere is such a dream to wear! Soft and warm. I am very happy with my coat. It fits me; shoulders are right, sleeve length is right, no bunching in back at my swayback, no pulling around the tummy and hips. Take that, ready-to-wear!