Wednesday, May 21, 2014

The Other MMM: Me-Made-Mittwoch

I started reading German sewing blogs in an effort to keep my dormant language skills (I was an exchange student to Germany in 1986-1987) from totally evaporating. Did you know that the German makers have a great spin on the MMM tradition? 

Me-Made-Mittwoch, like Me-Made-May, is all about how folks wear their self-made garments in daily life, except that it happens every week on Wednesday (or, Mittwoch!) rather than sequential days in May. It's a great way to see how sewers are wearing their creations in different seasons throughout the year! 

Here are some of my favorites from this week's outfits:


Frau H. aus E.: This dress from the Ottobre magazine is the essence of summer (and what a great fit).

Die Kakaohummel: Wow, this is a gorgeous dress.

Garderobenschau: Just discovered this blog this morning and I'm looking forward to exploring it. 
Ommella: Such a great piece of fabric!

Stoff und Ton, New Look 6096

La Magliera's Burda Top

' t naaikamertje: Love the laundry room setting! This blog has a Dutch URL but is written in German?

Anmasi's Welt: I just love her style and the wonderful dresses she creates.

Of course with Google Translate, we don't need language skills to enjoy sewing blogs from all over the world. I use it when I get stuck on a phrase (though of course Google Translate has almost as much trouble with some colloquialisms as I do). I love stepping slightly outside of the perspective of American culture and taste to see how dressmakers in other countries are thinking about and using their craft in everyday life!

Monday, May 19, 2014

Tool Tip: Famore Cutlery Seam Ripper

My late, great Great-Great Aunt Ethel had one all-purpose sewing aphorism: "If you're going to learn to sew, you gotta learn to rip." 

Whether for alterations or for our inevitable sewing mistakes, ripping out is an unavoidable part of sewing, so it is always nice to find a new tool or trick to make it quicker, easier and less fraught with the risk of damage. I first learned to use a razor blade to open a seam when I worked in a fabric store. Any sharp razor blade will work and, used carefully, it can be surprisingly gentle to the fabric. 

While holding a plain blade carefully by its spine works pretty well, it does present a long surface to the seam, and angling it too far in one direction can result in an unintentional cut in the fabric. A handle is a nice way to get a little bit more control.

This Famore tool is not the first handle and blade I've tried. The Dritz version is worthless. Dull and awkward. An Exacto knife handle can work, but Exacto blades are so pointed at the tip that they can easily pierce the fabric (or you!). This Famore Cutlery 5.5" Seam Ripper with Replaceable Blades is the best I've found--precise, comfortable in the hand and very, very sharp. I got mine at a local quilt shop (as it was in the process of going out of business), but you can order them from the company's website.

The cutter comes with a rigid plastic cover for the tip, and it's definitely needed. This item should never be laid down with its blade exposed, as there are many scenarios for damage or injury.

Have you ever heard of Famore Cutlery or tried any of their products? Other than the cutter, I am unfamiliar with this brand. The Micro-Tip Scissors look really good, and have wonderful reviews on their website.


Thursday, May 8, 2014

Sometimes Simpler is Better: Simplicity 5914 Skirt


Sometime in the past year I discovered The Secondhand Years, the blog of irrepressible Curtise. Her knack is to use the slightly eccentric vintage clothes she favors as a sort of prism through which she looks at and thinks about life, children, work, friendship, happiness, motivation, expression...and whatever else might be on her mind. She has a talent for exploring trains of thought which are both very individual and idiosyncratic, but also relevant and thought-provoking to her readers. So it is exciting that she has taken up sewing (for the first time since high school) in the past month. Thinking about her new foray into sewing, I was reminded that some of my earlier creations were at least as successful as recent ones, despite my perception of having learned a few things along the way.

Why is that, exactly?!?

I can't find a blog record of it, but I made Simplicity 5914, view E, quite a few years ago--probably seven or eight years ago. It must have been pre-blog. Even then I didn't think of that skirt as particularly great. The fabric was a mid-weight stretch denim from Hancock's, and I remember that it retained some fold and fade lines from the bolt after pre-washing. At different body weights it fit, naturally, differently--higher or lower on the hip. But despite those differences, its simplicity and its less-than-noble fabric, I wore that skirt constantly until it was a real rag.

Simplicity 5914, now out of print but easy to find on eBay or Etsy.
The earliest of the 56 reviews of this pattern on PatternReview were from 2003.


I always meant to go back and make another one, but every time I bought a piece of denim, I'd think, "Maybe I should make it like the old one, but with a front buttoning placket," or "This time with pockets--I'll love having pockets!" None of those skirts had the staying power or versatility of the original skirt.


So this time I just made the same old skirt, already. The only difference is the fabric, a very nice heavy-but-drapy ramie denim from FabricMart (all but sold out as of this writing).


The front and back panel seams are sewn, serged, pressed to one side and topstitched twice, using two strands of regular sewing thread in the needle. The hem is turned up and has three rows of topstitching spaced 1/4" apart.


The waistband facing is trimmed with a strip of self-made rayon bias binding left over from another project. To help this skirt fit smoothly at the waist in the back (where my skirts have a tendency to bunch up due to swayback plus large bottom), I cut the skirt waistline 3/4" lower at the center, tapering to the original seamline at the sides. This worked well to make the skirt fit more smoothly.

I've decided that a side zipper suits me best. A center back zipper pokes me in the spine when I sit because of the swayback issue. This skirt is designed with a side zipper, so no changes there.


The triple topstitching at the hem was easy enough to do, but I have one tip: start with the line of stitching closest to the bottom of the hem and then move to the next and finally the top line of stitching. Because of the flare of the skirt, there is a little bit of ease at the upper edge of the hem, which would throw off your results if you stitched that line first.

The turned up portion of the hem won't look perfectly smooth at the top on the wrong side unless you cut and apply a shaped hem facing (which I didn't, but I'm fine with the slight wave of the eased-in edge). 

Time will tell whether this skirt will have the magical rightness of its predecessor, but early signs are good. Maybe with the example of Curtise and her new sewing hobby before me, I can be more aware of those earlier instincts and impulses that worked out well in my sewing.

Have you ever realized that your oldies were decidedly goodies?


Tuesday, May 6, 2014

Five Reasons the Big Four Should be Very Nervous About Indie Pattern Designers

So, you know about Sewing Indie Month, right? If not, the soundbite is: 21 independent sewing pattern designers joining forces to showcase and celebrate their growing numbers and reach.


You can get the whole scoop--including links to the participating indie designers, sew-alongs, contests and prizes--over at Rhonda's Creative Life (among other places), which is where I heard about the event on May 1.

Seeing these companies, who are after all competitors, banding together to build excitement about their niche got me thinking about all the things the indies are doing right--and what that is likely to mean for the future of home sewing.

If I worked at one of the Big Four pattern design houses (Vogue, McCall's Patterns, Butterick and Simplicity) or their subsidiaries (for example, New Look and Kwik Sew), I would be viewing the emergence of so many new options for sewers with growing alarm. Here's why:

Reason #1: Collaboration

As Sewing Indie Month and Perfect Pattern Parcel show, the indies have come up with a clever strategy for leveraging their individually tiny companies against the big guys: by collaborating and supporting one another, they will be able to grow their collective audience exponentially. Rather than going it alone, they are working together to present indie patterns as a new and appealing alternative to traditional sewing pattern options.

Sewing Indie Month even has a contest focused on creating looks from two or more indie companies! If that's not a sign of embracing collaboration, I don't know what is. Wanett of Sown Brooklyn is heading up this contest, so check out her site for more information and inspiration.

Closet Case Files Nettie Bodysuit with By Hand London's Flora Skirt

Reason #2: Community

Just today, the McCall's Pattern Company excitedly posted on Facebook: "We've gone social! Find us on Twitter, Instagram, Pinterest, and, of course, Facebook. We'll talk patterns, sewing, sales, tips and more!" Good timing--if this were 2011. Indies have embraced social media and have built communities of supporters and fans by reaching out to bloggers, establishing active presences across multiple social media sites and encouraging interaction with their brands. From the outside looking in, it seems as though the leadership at the major pattern companies is just now recognizing that using social media effectively is going to take more commitment than assigning Facebook duty to a junior employee in his or her spare time.

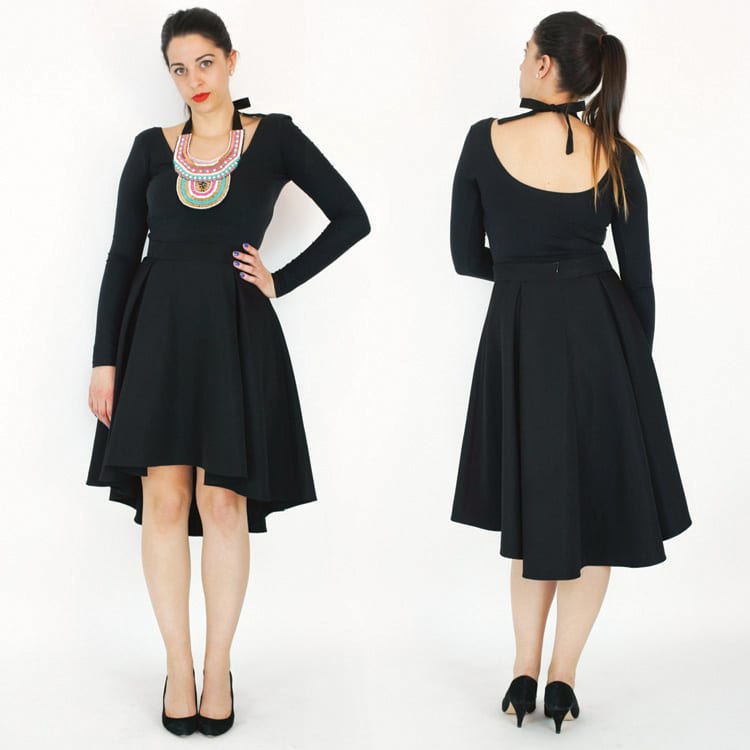
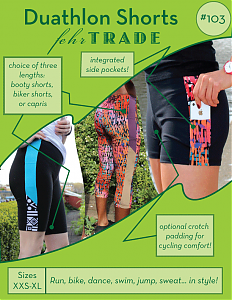
Before launching her pattern line, Melissa of FehrTrade was an extremely active member of the online sewing community since 2005


Reason #3: Identity

Indie pattern companies have done a great job creating distinctive identities for their companies. Every aspect of their presentation, from their logos to their websites to the language they use in their blog posts, communicates important information about the personality of the brand and its customers. Understandably, the major pattern companies don't have the luxury of defining themselves so precisely. They use conventional models and well-established graphic customs to present their designs. Their customer must translate that information to get an idea of how a pattern might look on her, rather than on a tall, slender model or in a fashion illustration. Most indies make it easy to see exactly how real people are interpreting and wearing the designs, helping the sewer to quickly understand whether she is their target market.

Colette Patterns has had a strong graphic identity and a distinctive voice from its early days

Reason #4: Support

Indies are really winning in this category, with amazingly detailed, helpful and thorough step-by-step tutorials and sew-alongs. There are so many that it is difficult to single out a few to mention, but these jump immediately to my mind:
The amazing thing about these information resources is how valuable they are as general information. I learned so much from the Carme blouse sew-along, though I'm sure I'll never purchase the pattern (not really my style and out of my budget--but it's lovely!). 


Reason #5: Freebies

With their $1 pattern sales, I ought to feel like the major pattern companies are practically giving away their wares (because that's true), but nothing gives a warm, fuzzy feeling like a free pattern. It's a low-risk way to give a new company a try, and independent pattern companies have created a plethora of versatile, useful free patterns in many different categories. It's clear from my sewing blog feed that these patterns aren't just out there, they are incredibly popular, with enthusiastic reviews of free patterns appearing every day.


Don't get me wrong--both major pattern companies and independents are well-represented in my pattern cabinet, and I admire many aspects of the major pattern companies' offerings, business model and role in the history of home sewing. But I think they need to take a very serious look at the smart ways independents are using the advantages of their small size and direct connection to the active online sewing community to grow and to flourish. It's an exciting time to be a passionate seamstress, and I for one am looking forward to trying out some new indie designers I've discovered as a result of Sewing Indie Month.

Monday, May 5, 2014

Rooster and Me


I had a free moment in the classroom when I was substitute teaching last week so, while I waited for the seventh graders, I snapped this photo of my favorite little brooch. He's a vintage rooster, with colored enamel over silver, and I do love him so. Years ago I lived on Beacon Hill in Boston. Many of the things I wasted my money on back then (like rent!) are long gone, but not so this little rooster, who came from a wonderful vintage jewelry shop on Charles Street. I don't believe it is there anymore.

The cardigan is carried by Modcloth (I got mine locally at Virtue on Lexington Street in Asheville). Modcloth calls it the "Dream of the Crop", and here it is in navy. I have it in orange, jade and camel. Last year I had one in mustard, which was a pretty color but was too bright for me. It got lost, but I think that may have been for the best. These little cardigans are very short and work wonderfully with the kind of dresses that this short person likes to wear. They wash well, but I have been warned (over and over) by the young women at Virtue to never put them in the dryer. So far I have managed to obey this stern warning, and all has been well.

I wore one of my favorite dresses, a plaid shirtwaist made from a couple of different patterns. You can read the whole story in this blog post.


Friday, May 2, 2014

More Sewing for Victory: DuBarry 5265 Blouse


Today's basic blouse is my fourth version of a vintage pattern from the 1940's, DuBarry 5265. In this post from last summer, I discuss some of the features that drew me to this particular princess seamed dress, which was easily shortened to blouse length. I like the sleeves, which are not gathered but shaped by three small darts at the sleeve cap. This design adds volume like a puffed sleeve, but looks a bit more tailored and grown-up. I added a small band to the lower edge of the sleeve to finish it off.

I'm not good about either making or wearing white blouses. This one is in the Robert Kaufmann Brussels Washer fabric, a blend of linen and rayon (available in white at Fabric.com here) which has some nice qualities. Since it is heavier than a shirting weight, it is opaque even in white; that must be why I picked it for a blouse. It isn't the smoothest fabric in the world against the skin, though--I find that it feels a little rough.

My favorite aspect of this blouse is the buttons, harvested from a Liz Claiborne plaid shirt found at our Goodwill-by-the-pound outlet in Asheville. They have a pearly center set in a ring of burnished metal.


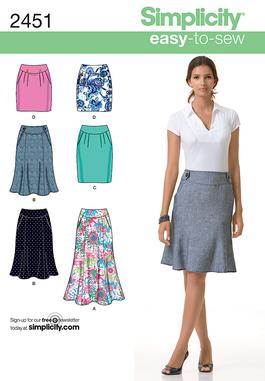
The skirt is also a recent project, but I am sadly disappointed in it. The pattern is Simplicity 2451, a design which has been made to great effect by many sewing bloggers. 


I seem to have gotten the proportions all wrong--too wide and too short, and the curving front yoke just doesn't look pretty on me.


It's too bad, because the skirt has pockets, and I love the color of the silk noil fabric, a perfect caramel. Oh well, they can't all be winners, that's for certain!


The rhododendrons are in glorious bloom in Asheville! 


Tuesday, April 29, 2014

Adjusting the Sweetheart Neckline for a Narrow Chest

I promised you the lowdown on how I solved my sweetheart neckline problems for my Sew for Victory dress. As I've mulled over how to explain my process, I have been seized with anxiety on two fronts: first, can I explain what I did clearly enough and second, will my adjustments work for someone else? So I present my notes with this caveat: I hope they will be helpful, but I can't claim the backing of a sewing authority for this approach.

On the other hand, I've tried the approaches suggested by the sewing authorities for this problem, and they didn't work for me!

First, here is what I am thinking of when I say "sweetheart neckline" for the purposes of this discussion:


Whether the bodice is shaped by princess seams or darts, the "sweetheart" neckline shape is one that comes to a slight point at the center front and then opens out to the sides. The designers of the 1940's favored a much more demure opening than we see on modern versions of this neckline.

Because I am narrow from armpit to armpit (12" at the most), the opening on the modern sweethearts is just too wide for me. By comparison, most patterns seem to be assuming an armpit to armpit measurement of 13" to 13 1/2" in size 8. With a garment chest measurement that is 1" to 1 1/2" wider than my chest, an open neckline exposes my bra straps, gapes and falls off my shoulders. I have the same problem in RTW. I would never try to buy a dress like the lace and pink one above, because I know that there is no way that it would fit and no way that it could be altered to fit. Even a size 0 or size 2 would be too wide in the upper chest and comically small everywhere else.

Square necklines and wide scoops present similar problems, but they don't appeal to me as much. Also, these shapes are easier to adjust at the pattern alteration stage because we don't have to try to preserve that nice curving point in the center.

The usual fitting advice for "narrow shoulders" is to reduce the shoulder width by taking in at the armhole, but this just makes the shoulder section tiny and pulls it outward, giving it nothing to hold on to and no power to cover my bra. 

Working up the resolve to counter this problem was a challenge. Even though I am drawn over and over again to sweetheart necklines, I have at least two painful failures in my past: 

The first Simplicity 2174. Can you see how I made the shoulders too small to try to counteract the gaping? Even standing still, this is very uncomfortable.

Vogue 9668 from 2009. It's been so long that I don't really remember all the ins and outs, but I never once wore this dress. In my second blog post on this dress,  I say that I removed an inch on each side of the neckline to make it cover my bra!

So I did the right thing and made a muslin of the change I had in mind.

May I present...the world's ugliest fabric? It was part of a free bundle from FabricMart. It's actually quite cool how the print frames the neckline, but overall it looks hideous on me. I cut the peplum on the bias to try to encourage a little drape, but the quilting cotton is so stiff that using the bias made little difference.


For this version, I drew a long line from the middle of the central part of the neckline to the lower part of the princess seam. Then I drew a second line 3/4" away from the first at the neckline, tapering to the same point at the princess seam. I cut on the first line to a hair away from the point on the seamline and overlapped that cut edge, matching the second line.

The two lines are highlighted in red.
The important point here is that this line cannot go through the center front fold, as it changes the angle of the seam it terminates in. For the moment, ignore the white wedge opening toward the shoulder above. You might also notice that I've marked a 3/8" seam allowance at the princess seam. I trimmed away 1/4" from the standard 5/8" allowance after I had made all my pattern changes. It is possible to sew a princess seam without first staystitching or notching if the seam allowance is 3/8", but not if it is 5/8".


You might wonder why I couldn't just remove this width all the way down the center front fold. I could do that, but then the point of the V would be higher and I would have that much less room at the waist as well (which is the opposite of what I actually need at the waist).

So, this wedge-removing alteration took care of the gaping but resulted, again, in binding at the armhole!! It finally struck me: I need to reduce the width right where I am extremely narrow, and then add it back in again toward the top of the shoulder line. My shoulders are narrow side to side but at least normally deep from front to back, and narrowing the upper chest was also removing all my ability to move my arms.


Before we move on, I should point out that I made the same adjustment to the center back pattern pieces as to the center front (removed a 3/4" wedge tapering to the princess seam). Because this alteration goes through the neckline and does not reduce the actual length of the shoulder seam, I didn't necessarily have to do the same thing on the back as on the front, but I happen to know I need to narrow the back as well as the front.

Thus, the breakthrough was to do the opposite alteration at the shoulder line as I had done at the neckline: draw a line to the princess seam from the shoulder seam and then spread it 1/2".


Above you see the added wedge at the shoulder, and you also seen that I have overlaid the side front pattern piece onto the center front piece. I drew the armhole seam line in red so that you can see how the measurement from the center front to the bottom of the armhole  (as if you were looking at me straight on, and saw me from armhole to armhole) is 6", or 12" total from side to side. Depending on exactly where I measure, the dimension might be a little more, but the point is that I have narrowed the center but replaced that width at the top of the armhole to allow for arm movement.

Another benefit for me of this alteration is that it places the princess seams over my bust apexes rather than out to the sides.


Of course I had to make the same change to the back pattern piece at the shoulder line, since now the shoulder seam had grown longer in the front, and of course I also had to alter the neckline facings to work with my changes. To alter the facings, just lay them over the pattern pieces and, in this case, cut off the excess at the appropriate angle. The facings are only involved with the shape of the neckline, so the changes at the shoulder seam did not affect them.

Next time I feel like expanding on this progress, I might take on an even wider sweetheart neckline to see how much openness I can preserve while still staying covered and managing to move my arms. But for now I am happy with one sweetheart neckline pattern that finally fits.