Friday, December 25, 2009

Simple Christmas


The path of least resistance led to a simple Christmas this year. And I don't just mean that we didn't buy much, though we didn't. The boxes of ornaments stayed in the attic. Our son got his long-time wish to have a live tree, which we left outside and decorated with pine cones, dried amaranth from our summer garden and cranberrry rings.

These two ornaments spent just a few moments on its branches before being gifted to friends who stopped by on Christmas Eve. They are very simple, but they were fun to make with scraps of linen, cotton and ribbon. And sweet, I think.

Sunday, December 20, 2009

Two Years Later, I Wear this Dress


I actually made this dress, according to my note on the pattern envelope, in December 2007. I just wore it for the first time on December 13, 2009. Why the delay? First, I simply didn't have the right occasion. The lovely fabric, with its gold threads and colorful pattern, seemed to demand an especially festive event. Second, the neckline was just too low to wear without a camisole. Believe it or not, I didn't have a large enough scrap after cutting the dress (in a single layer layout) to make a modesty panel or cami. I just couldn't get into the idea of pairing the dress with black. I wanted to keep it all happy colors.

The breakthrough came when we found out we would be traveling to Portland, OR to celebrate the wedding of my brother-in-law. Festive? Check. Cleavage? I decided to cut up a lovely top I had made in a gold fabric that turned out much too small (very little stretch in that stable metallic knit). The camisole from the 2-2009 Ottobre Woman magazine was perfect, as it had a bodice panel piece which I could just fit onto one section of my repurposed fabric. The unseen, princess-seamed portions of the cami were made from two kinds of black knit scraps from other projects.

Interestingly, at the wedding party, I looked around a room filled with black and gray clothed revelers. Wow, did I feel like a Southerner at that moment. It had never occurred to me that my bright dress would be very different than a typical West Coast urban evening dressy dress. But I don't mind being different! I just went with it.

With Kwik Sew 2948 cardigan

Closer view of fabric

Pattern Description: Knit dress in two lengths with bodice variations.

Pattern Sizing: Sizes 4-12. I made a combination of sizes 8 (at shoulder, neck and sleeve) and 10 (below armhole).

Did it look like the photo/drawing on the pattern envelope once you were done sewing with it? Yes, it's a pretty straightforward silhouette.

Were the instructions easy to follow? As I recall, now two years on, they were easy to follow.

What did you particularly like or dislike about the pattern? I liked the lovely results seen on other PR reviewers of different shapes and sizes. I could see that this is a forgiving design. I actually have decided that I don't particularly care for wrap styles on me. I never seem to feel completely secure in them, and they tend to place an emphasis on the bust line. I should have shortened the neckband slightly, which would have made the neckline more secure and lessened the need for a camisole underneath.

Fabric Used: Beautiful slinky knit from EmmaOneSock, described as having come from Chico's. I believe there were only one or two cuts of this print and I was thrilled to score one. I really had to work hard at the layout to get the dress out of the two-yard piece with the gold stripes running the way I wanted them. I cut a duplicate of each unfolded pattern piece and a full version of each on-the-fold pattern piece so that I could lay it all out before I began cutting.

Pattern alterations or any design changes you made: I made a 3/4" FBA and shortened the midriff and midriff overlay by 1". I chose the shorter skirt length (D), and I don't believe I shortened it further.

Would you sew it again? Would you recommend it to others? I'm not sure whether I will sew it again. Even though I like it and I feel like the fit is good, the fact that it took me two years to wear the dress makes me wonder whether this is a style that I feel comfortable wearing. But looking at all the lovely results PR members have gotten from this pattern, I can definitely recommend this pattern.

Thursday, December 17, 2009

Sewing, Imagined and Actual, in Portland

The first day in Portland, Oregon, I was pining for my sewing machines and sewing room. Catching sight of this front window in the neighborhood of Sellwood cheered me immeasurably. I saw the seamstress, too, but I lacked the courage to photograph her, sewing paparazzi style. A lovely lady with upswept white hair. Quite the match for her pretty sewing space.

In the midst of all the dreaming came an actual sewing task, albeit not one I consider my strength: altering! My sister-in-law had purchased two dresses, both of which had been altered and neither of which turned out quite right. I had on hand two needles, three bobbins of thread (black, cream and olive green) and a pair of nail clippers. Not enough to take in the bodice and shorten the balloon hem of a white satin cocktail dress. Off we went to JoAnn's (most interesting, as we have no JoAnn's in this area). I bought a tiny $50 crafter's machine, knowing it might not actually sew, but thinking that it also might be able to handle the few small areas I needed to unpick and restitch. There was a little set of accessories included in the box, so I didn't purchase a seam ripper or pins. I did spring for a spool of Gutermann thread.

When I returned the (utterly useless, unsuitable even for sewing the thinnest of fabrics, utter garbage) Singer PixiePlus, the woman who helped me said, "I don't know why anyone would ever buy this machine." Well, gee, sorry to purchase a product JoAnn's sees fit to stock. I told her that the handwheel fell off after the first seam. She replied, "What's the handwheel?"

Well, anyway, I did the sewing by hand. I deeply missed my beautiful sewing machines at home (not to mention a usable seam ripper and pins), but it seemed that the fixes were somewhat successful. The dress stayed on the bride, and the hem fell at her knee as desired.

I don't travel much, but if I did, I'd be in the market for a tiny machine to pack in my suitcase. In fact, I'm tempted to consider a little Elna Lotus. If I get one, I might never go away overnight without it.

Tuesday, December 8, 2009

To Ease the Way

Maya's travel pillow was one of those projects. One of those projects that make me say, "Now why didn't I think of that?" It's such a simple idea with such great appeal. A pillow. With a handle. Really Maya's version is even sweeter, with its little pocket to hold a doll or note to comfort a little voyager. But my little voyager doesn't so much go for sweet as for soft.

I cut the front from a rummage sale cashmere sweater (seventies-era! made in Scotland!) that didn't look as great as it felt on me. The gray wool for the handle, piping and back was a gift from my mom's stash. So everything that is visible was essentially free. But the insert inside was a fancy one, so soft, from Hancocks. Don't tell.


Believe it or not, because this is silly, I agonized over whether to add a zipper. Normally I like all pillows to have a zipper. Somehow the envelope style never looks quite symmetrical when it is stuffed. On my pillows, that is. Other people's look nice. But in the end I slipstitched the opening closed at the bottom. I was worried a zipper might scratch or otherwise catch on something when the pillow is being toted about.

He's slept on it every night since the last stitch was sewn. We'll see how it does on its five-and-a-half hour cross-country flight coming up later this week.

The dog likes it too.

Wednesday, December 2, 2009

Belated


As an only child, I might have thought to marry someone with lots of brothers and sisters. But, well, other considerations (such as compatibility and emotion) won out. And so I have but one very dear, very far away brother-in-law. And he got married more than one year ago, with little fanfare, to a beautiful only child in Portland, Oregon.

Finally we are flying out to a belated celebration of their wedding! This little quilt and pillow will fly ahead of us, and I hope will make up for the delay.


The fabric is Anna Maria Horner's Good Folks (that woman is a right genius). The pattern is Amy Butler's Lotus Path. The quilting is...from the heart?

The quilt makes me happy just to look at, so it seems right for commemorating a union. A small family is just fine, when you love every member so much.

Tuesday, December 1, 2009

Air Quality for the Sewing Room and Beyond

I've spared the blog the sad tale of my recent basement flood and the subsequent sewing room mayhem, but the funky smell has lingered long after the destroyed rolls of fabric have made their way to the landfill.

Our friends Liz and Sam have invented an industrial-type air filter that goes into your regular heating system. When our flood occurred, I was using a regular garden-variety Home Depot filter because I happened to have it on hand. But a few days into the cleanup, I noticed that the sour smell was permeating our whole house. I reminded myself of the size that was needed and got a new Safe Home Filter. Wow! Within a few hours, the smell was bearable on the main level of our house, and within a day it was gone.

The filter removes all kinds of other nasty things as well (dust and fiber, chemical toxins, allergens, mold, pet dander), but just getting rid of the smell was benefit enough in this situation.

The basement is still rather rank despite quite a lot of professional carpet cleaning and drying, but we really can't expect the filter to have an effect on that when our HVAC system doesn't serve the basement.

Since installing the filter I have also noticed that cooking and pet odors have truly vanished. The filters are fairly expensive compared to ordinary filters (close to $40 per filter vs. about $6 for a standard filter), but so much more effective and convenient than a standalone air cleaner. One filter lasts for about three months, and I have an insider tip that can extend their life: vacuum a dusty filter and reinstall.

Monday, November 23, 2009

One-Yard Wonder T-Shirt Tutorial

Last winter, I made a bunch of t-shirts with 3/4 length sleeves. That length seemed to be in style, and I was loving that I could make them out of just one yard of 60" wide fabric. But do you know what? I am cold, cold, cold natured these days, and I need a whole sleeve, darn it!

Even so, I persist in buying just one yard of fabric. It's easy to get a smaller sized front and back out of a yard, but obviously two 22" sleeve length from shoulder to hem can't be cut from a 36" long piece of fabric (I'm short, but I do have two arms!).

But there is a way to get that yard to yield long sleeves, and the way is called cuffs. Cutting this out is a bit improvisational for each piece of fabric, but I've tried to give you an overview of how I have gone about it. Prewashed fabric may shrink, your cut may have been off grain and you had to straighten it, your arms may be longer than mine: I can't guarantee that you can get a true long-sleeved shirt out of one yard. But now that I've done it four times, I have to say I think you have a good chance.

First, here is a sketch of the general approach:

After cutting the front and back, I fold the remaining fabric in half from top to bottom and mark the center of the fold. One sleeve can be cut above the mark, one below. Measure the distance from the top of the fabric to the mark. Knock of a half inch or so just to give yourself a tiny bit of wiggle room. Measure from the top of the sleeve pattern to that measurement and make a mark. That is your cutting line for the sleeve. You can fold that bit back so as not to cut your pattern. Then cut two sleeves. I try to stagger them in order to leave a larger scrap to one side for cuffs. Don't forget to turn the pattern over for the second sleeve!

Look how close I had to cut it to get my two sleeves:

Now you will make your cuff pattern. Lay your sleeve pattern flat and place a piece of tracing paper on top of it. Trace the part of the sleeve you omitted, but fold up the hem allowance. Add two seam allowances at the top (1/2" to 1", depending on what you like). I say add two because you didn't add one to the upper sleeve section.

Then make a duplicate of this piece and put the two together in an hourglass shape, like this:

Now, wherever you can fit the whole length of the neckband on the crosswise grain (from selvedge to selvedge), go ahead and cut that strip.

Assemble the t-shirt in your normal fashion. After applying the sleeves and stitching the side seams, you will be ready to attach the cuffs. Here is a view of the cuff seam folded right sides together, and then beside it the cuff folded in half.

Attach the raw edges of the folded cuff to the end of the sleeve, fold it down, and your sleeve is full length...and hemmed!

With this busy print, the finished cuffs are hardly noticeable.


But in a stripe, there are lots of options for playing up the cuffs as a design feature. Notice that the sleeves are cut with the stripes on the bias. I couldn't get even two shortened sleeves from one yard with the stripes running horizontally because I couldn't work out the repeats properly. Now that it's done, I am so much happier with all the crazy stripe directions than with a standard stripe layout.


Thursday, November 19, 2009

Necchi Mirella

A few months back, I spotted a Necchi Mirella on eBay. As is so often the case, the photos were few, dark and fuzzy. It was difficult to know what I was bidding on, but I was eager to see one of these machines up close. The very unusual thing about the Mirella is that it is designed for both motorized and hand crank operation. Switching between the two is simple and requires nothing more than loosening the motor clutch, pushing in a button and attaching the crank.

In no particular order, here are some things I've learned about the Mirella:
  • Straight stitch only, with reverse
  • Rotary hook
  • Mirella-specific bobbins required; no longer made and very scarce
  • Low shank, but Singer attachments don't seem to work well
  • Motor is difficult to access
  • The body is made of aluminum, so the machine is extremely light and easy to carry
  • The free arm is accessed by unscrewing a knob underneath the machine and removing the extension. A separate cover is provided to protect the bobbin area.

Accessing the gear area on a Mirella, or on one of its sisters (such as the Lydia or the Silvia), requires loosening a set screw in the knob located in the middle of the handwheel. Then the knob can theoretically be unscrewed by holding the handwheel steady with one hand and loosening the knob with the other. In actuality, this proved very difficult. I eventually got the knob free by removing the set screw, oiling with Tri-Flow through the set screw hole, cushioning the knob with a rubber jar gripper pad, grabbing the pad with pliers and applying force. It took some effort!

With the end plate removed, you can see the very simple inner workings of the machine. If this were a Lydia or a Silvia, you would see the nylon camstack between the top and bottom gears. This camstack is very often cracked and is no longer made. It is my understanding that repairs are all but impossible. If the crack is small, the machine can often operate and perform some of the stitches but not the ones controlled by the cracked area.


Thursday, October 22, 2009

Ta Da--A Treadle


Thanks to the Craigslist generosity of David, of North Street, Asheville, and the carpentry skills of my husband, Eric, I can treadle!

But, um, I need a lot more practice to get good at it.

This, as much as anything, I love about the project: it was free save for the three cans of spray paint required to coat the rusty base. We were able to repurpose the center section of a now-unused drop leaf kitchen table for the top. All tools were on hand, even the fancy-schmancy Forstner bits necessary to cut the round holes for the hinges. By the way, Necchi-lovers, the White hinges matching the treadle base fit perfectly into my BU, with no alteration (such as is needed with Singer hinges).

Thank you, Eric and David.

Friday, October 16, 2009

Variations on a Theme


Simplicity 2614 again. Now that I've tried out a new sleeve, a new sleeve cuff (both lifted from the Everywoman's Favorite Cardigan from the 2/2009 edition of Ottobre Woman magazine), a center back seam and covered buttons, maybe I'll be able to try out a new dress pattern. Goodness knows plenty of them are calling from my pattern stash!

This version is Sophia knit (polyester, rayon and spandex) in teal. Currently available, along with any number of other items that just keep arriving on my doorstep, from fabric.com.


Friday, October 2, 2009

It Has Happened to Me


A free haul of vintage sewing treasures...or trash. Hard to say which! The listing for two free machines and a treadle base showed up this morning on our local Craigslist. I called the moment I saw the ad, only to find that I was fifth down the list, and that someone else was on the way to pick up the machines.

I expressed my appreciation for the owner's generosity in offering the machines and went on with my day. Thirty minutes later he called back and said the first person had taken a look and passed on the machines. He happened to have my number handiest in his cellphone and called me back first! I threw on my clothes and hustled Finn into the car.


I can't lie: the machines as found in the basement were in daunting condition and covered with rust and cobwebs. I don't know how functional the machines will be or whether I will want to restore them. But they are so beautiful! I can't wait to clean up the painted surfaces to see those gorgeous designs.


Even better, the treadle turns like a dream, despite her rust and grime. I think she's lovely, and I know she will clean up and function well.

Thursday, September 24, 2009

Not a Dress

But rather half of a World War II paratrooper outfit. Strict historical accuracy not demanded. Ability to withstand frequent laundering essential.

Trying to purchase a dark colored, long-sleeved, woven twill shirt in a boy's size is amazingly difficult. Seems so basic, but apparently not the variety of basic that retailers think we want this year. My young trooper was quite specific in his requests, and he seems happy with the result.

Except that now he wants the matching pants...on the double.


Tuesday, September 22, 2009

Director of Buttonhole Operations


"A Sewing Life is pleased to announce the promotion of Singer 128, originally of Elizabeth, New Jersey, from Mysterious Vintage Attachments Specialist to Chief Buttonholer. Mr. 128 has overcome a number of challenges in his rapid ascent with the operation, including musty smells, tension shortcomings and chronic snarling in the bobbin region. His triumph today over Bernina 160 and Necchi BU is made all the more impressive by his recent conversion to hand crank operation."

Many bloggers have posted helpful tutorials and videos on vintage buttonholers, but the one who posted the very morning of my successful first run was Brian. Thanks for the information and inspiration! One of Brian's insights was that using the provided feed dog cover can make for tight quarters underneath the buttonholer, and I found that to be very true. In the case of this wool jersey (Vera Wang, from fabric.com), the attachment had no trouble moving the fabric around, but it was a bit nerve-wracking getting everything lined up without distorting the knit. Since Mr. Singer lacks a control to drop the feed dogs, using the cover was mandatory, but happily, everything worked out well in the end. For two of the buttonholes I used some water soluble stabilizer to smooth things along, but it simply added another layer to wrangle and didn't seem to improve the result.


Brian also showed using a center needle position buttonholer with a left needle position machine (in his case, a Kenmore). I bought a Kenmore-branded Greist high shank buttonholer that refuses to attach to my Necchi BU (the shape of the needlebar seems incompatible with the groove in the buttonholer?). Inspired by Brian, I decided to test the Kenmore buttonholer with another recent machine acquisition, a left needle position Japanese machine from the 1960s. All went well until we reached the top left edge of the buttonhole, when the needle hit the rim of the buttonhole opening (the rectangular area where the buttonhole is created) and broke. Too bad! Nothing ventured, nothing gained. The real investment in these vintage machines is not the purchase price (small), but the time in researching and testing the various combinations and settings.

Pending better light for modelled photographs (rain, rain, rain here in Western North Carolina for the last four days), here is a preview of the finished cardigan, from the 5-2009 issue of Ottobre Woman.


Sunday, September 20, 2009

Thrifty Guilty Pleasures

Yard sales: I have conflicted feelings about them. I love the thrill of a good find as much as the next person. And it is wonderful to get things we need from someone who no longer has a use for them rather than from a big box store. But it is still consumption, still buying and still stuffing our perhaps-already-overloaded storage spaces with yet more surplus.

There you go: conflicted.

My son loves yard sales, and they do make for some good entertainment. Yesterday, he came home with a large plastic pipe (for creating a bazooka), while I (the anti-consumer, you know) netted four pieces of fabric and a rolling cart.


The cart comes at a welcome moment. I've been eyeing rolling sewing machine cases. They look handy, well-designed for protecting the machine and very expensive! Not to mention quite glaringly unattractive. I had been turning over in my mind that there are many, many cases and carriers for all manner of baggage in our attic. How could it be that a solution didn't exist there already? I decided that the missing elements were a frame and wheels, in a configuration that could accept a sewing machine in a hard case. This American Tourister cart is sturdy, so I know it is up to the job. And only $2. Shown with the Capitol Deluxe rummage sale find of three weeks ago (ahem), and a divine piece of vintage wool plaid blanketing fabric from yesterday.


Probably the best fabric find was this Viyella. Only 36" wide, but nearly three yards, so enough for a blouse. Viyella is a wool and cotton blend of high quality.

Saturday, September 19, 2009

Sent from Lace Heaven

Inspired by this shirt from the Boden kids catalog, I went in search of stretch lace for trimming tees. I found myself in Lace Heaven. It was an exciting moment when that promising envelope arrived in the mailbox.


I would love to say Lace Heaven had every color my heart could desire, but my heart has many, many desires, one of which is stretch lace in a narrow width in chocolate brown. Didn't find that, but there were many jewel tones to compensate. I am excited about giving these a whirl on some fall t-shirts.

In the past week, I've completed a second version of the Ottobre Woman Pigeon Gray dress, this time in a black and white loosely woven sweater knit, as well as a quick pair of yoga pants in black Powerstretch to go with the dress and the other tunics I'm making. Look for them soon.

Wednesday, September 9, 2009

Simplicity 2614: The Knit Version

Using a knit fabric to make up a pattern designed for a woven has been on my list of things to try. Simplicity 2614 was the base for this dress, but the neck binding was inspired by Onion 5038 and the pocket is from design number three of the hot-off-the-presses 5-2009 edition of Ottobre Woman.

To make the blouse-length pattern into a dress, I simply added about twelve inches of length to the lower front panel, tapering out a bit more at the side seams in the hip area. All the pieces can be cut on the straight of grain rather than the bias, since the knit provides the stretch. For the back, I split the single back panel into two pieces at the same level as the empire seam in the front (adding a seam allowance to upper and lower piece). The lower piece I cut with a center seam and a swayback adjustment. I'm not completely convinced that this is the last word in how to best fit the back for me. I like continuing the empire seam around the whole dress, so that it functions like a waistline. On the other hand, using a center seam down the entire length of the back would allow for more control of the swayback curve. I can't see using the empire seam plus a center seam from top to bottom, creating a + motif in the middle of my back.

The hem was finished with a simple serger rolled hem, as I'm thinking of wearing this as a dress until the weather turns decidedly cooler, then shortening it to tunic length to wear over jeans and a long sleeve shirt for winter.

Love the way this turned out! I also made a three-quarter sleeve version in a black colorway of the same print (from fabric.com). Pictures will be forthcoming.

Wednesday, September 2, 2009

Necchi BU Review


Have you seen Zigzaggers? It's a very fun site for those of us interested in vintage sewing machines. I contacted Krista about reviewing some of my (growing) herd of machines, and she very kindly sent me the questionnaire. Since the Necchi BU is currently the alpha sewing machine around here, I'm starting with it.

Love it, hate it, or something in between?
Oh, I certainly love it, but that's no great endorsement, since I seem to love all of my machines. I first got interested in trying out a vintage Necchi when the circuit board on my Bernina 160 failed. I surfed the internet reading various reviews and just happened across a couple of glowing accounts of vintage Necchis on Pattern Review. Their enthusiasm led me to the Vintage Necchis Yahoo Group. After reading along on this group for a couple of months, I had to have one. What they said is true, there is a quality to this massive chunk of Italian machinery that is quite unlike any other sewing machine I had used before.


When did you buy this sewing machine?
Summer of 2008. I had to wait until the fall to actually try it out. Read on...


When was it manufactured?
According to the Vintage Necchis Yahoo Group, this model was manufactured in Italy between 1948 and 1953. The easy-to-spot differences between this model (BU) and its successor, the BU Nova are the VN (for Vittorio Necchi) logo on the machine bed, and the plain chrome face of the tension assembly. The later model had the newer cartoon-style N logo and a black face on its tension assembly.


The BU is a flat bed machine with an oscillating hook and manual zig zag (which I believe means you select zig zag by shifting the stitch width lever rather than pushing a button). Necchis designated as BC, BCJ or BF are straight stitch only. The BU was manufactured in black or green. It is a very simple, very heavy cast iron machine with no plastic parts whatsoever.

Where did you buy it?
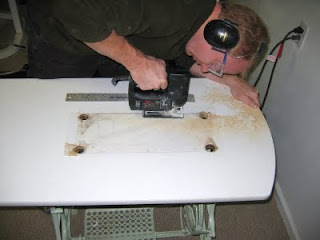
I had been watching eBay for a vintage Necchi for several weeks. This machine was listed by a damaged freight company. As far as I could tell from the very indistinct photo, its spool pins were bent, and the plastic modern case it had been shipped in was cracked, but otherwise things looked okay. It turned out that it came with no power cord or foot pedal, or attachments other than the bobbin case, one bobbin and the all-purpose presser foot. I had ambitions of resolving the power situation myself, but in the end I took it to a local sewing machine mechanic who was backed up for seven weeks! The replacement foot control he provided is okay, but it does have a tendency to race. Since I sew clothing, I like to go slowly much of the time, and I find that I don't have the control I would like. I've heard of others with similar problems with replacement foot pedals. When the perfect treadle table comes along, I plan to convert this machine to treadle operation.

I don't have a base or a cabinet with hinge pins for it. For this heavy machine, the extra stability of one of those would help reduce vibration.


How much did you pay for it?
I paid $55, plus $30 shipping, which was a good deal, but then I spent around $100 for the mechanic's services and the foot pedal, and $40 for a set of attachments belonging to a BU Mira. My total cost was higher, and my gratification much more delayed, than if I had bought a complete outfit to begin with.

In hindsight, I would not recommend buying a machine over eBay in unknown condition as one of your first vintage sewing machine purchases! A complete setup from a local source, or a well-established eBay seller, might have been a better way to go. In the year that I've been on the hunt, I've only seen two Necchis in my state (North Carolina). One had a broken part that is no longer available, and the other was the same machine I have, but after I had already bought this one.


How many projects have you done on this machine?
Quite a few, but other machines have happened along since, so it hasn't been my only machine. I pieced a twin quilt top and made my son a pair of jeans as the first pair of projects. I have made a couple of denim skirts for myself, several cotton blouses, a rayon dress with piping and six very wide and long sheer curtain panels.

Describe the kind of work you've done with it. This machine is wonderfully well-suited to a wide variety of woven fabrics. It handles light fabrics just as beautifully as very firm and heavy fabrics. I am not sure, in all honesty, that it pierces heavier fabrics any better than my modern Bernina 160 (which I did have repaired, to the tune of $250!). And I have not had great luck at all using it on lighter weight knits, such as jersey.

What do you like and what do you hate about it?
The sewing experience on this machine is fantastic. The BU gives me the feeling that together we can push right through nearly any project. It handles thick topstitching or upholstery thread in the needle and the bobbin much, much better than my Bernina. I love that it has an adjustable needle position (left, center and right). My Bernina probably has 10 different positions from left to right, but I love the simplicity of the three, which turns out to be plenty for any need. I like that it has adjustable presser foot pressure, which two older Berninas I used to own did not. I like that the feed dogs can be dropped for free motion work, though I haven't explored that much yet. This machine is a high shank model, so it can use many industrial presser feet. These feet are rugged, very specific to a purpose and cost between $5-$10 per foot. Compare that to between $30-$60 per Bernina foot!

Somehow the visibility of the sewing surface and the ease of reaching it on this machine are both great. The "head" of my Bernina seems to be higher and come forward more, and I feel like I hunch over more when using it. The ergonomics of the Necchi are terrific for me. It's awesome to set the levers in one position and know that they will stay put until I change them. On the other hand, it isn't so easy to change back and forth between different settings on the fly.

I wish it handled knits better, and sometimes I wish it was a pink and cream Supernova with the circular needle plate and a full set of cams! This machine does straight stitch and zig zag, forward and back, and free motion work. That's all. That's enough.

I haven't seen a lot of discussion about the way the needle mounts on these vintage machines versus the more modern arrangement, but it presents an issue for me. The needle mounts with the flat side to the right. Threading goes left to right. This is not just Necchis, but actually all of my vintage machines. It's easy enough to thread, and easy to insert the needle once you learn which way the flat side goes, but it doesn't make two parallel rows of stitching with a twin needle. Instead the twin needle makes a sort of a shadow effect vertically. I like to use a twin needle for hemming knits, so I have to hold onto a modern machine for this purpose.

Tuesday, September 1, 2009

Vogue 9668, Take Two


Thank you so very much for your votes! In response to some gentle nudges at Pattern Review, I am posting a couple of additional photos. You were right, the previous photo didn't give enough information to really judge the length. If you vote today, please base your opinion on the photo from yesterday, to keep things consistent. So far, shorter is winning!

Above you can see the hem pinned one inch shorter than shown yesterday.

I also agree that these shoes look too clunky with the dress. They are my last remaining pair of Danskos, which I used to buy thinking they were a comfort shoe, but finally realized aren't even particularly comfortable for me.

But do you know what? The pictures don't lie, and I can't help but feel like the real problem is that this particular dress just doesn't flatter me. My fitting isn't great (especially the bust), and that could be worked on, but I am thinking it's maybe not worth it. The color is so blah, and the black piping just drags it down rather than perking it up. I don't wear cream or beige well. I thought the black would counter the cream enough, but I am just not feeling good about the result.

I had to narrow the sweetheart cutout by almost an inch on each side to enable me to wear a bra with straps (very much necessary), and that too detracts from the cuteness of the dress.

In a more cheerful vein, I must recognize the good photography work of my 10 year old son on today's photos. His pictures have so far worked out much better than either my mom's or husband's. I'm impressed!

So it sometimes goes in a sewing life...

Monday, August 31, 2009

Hemming and Hawing


Your opinions will most definitely be appreciated! I have been working on Vogue 9668, described on the pattern envelope as: "Lined dress, below mid-knee variations or lower calf, has neckline variations, fitted, self-lined bodice, midriff, tapered or flared skirt and back zipper. View A: short sleeves."

One day last year I ran out to buy this pattern (which is still in print). I had to have it right that moment! I was going to start it the very next day! And then it hit me that fitting the bodice would not be easy at all. It's taken a long while to work up the courage to wrestle with it. Even though this dress is far from perfect, at least it goes around me without falling off my shoulders. I started with an 8 in the upper chest and added ever-so-much width and length to the bust (and width to the waist). In fact, now I know I overdid it with the FBA, but no way am I ripping out all that piping and lining and stuff. This version will be good enough for itself.

Now I just want to hem it, review it, and move on to another version. My mom very kindly crawled around on the floor marking an even line and pinning up a hem. She even went so far as to take a photo. I wish we had gotten a front view, but I hope you get some sense of it from the side.

I'm worried that this is a touch too long and a bit more matronly than siren. I'm also worried that I need much more powerful underpinnings than those pictured, but that's another issue. My mom favors this length. What do you think?

Sunday, August 30, 2009

There I Go Again

As the nice lady at the church rummage sale said, "You must have a soft spot for the old ones."

Yes, I must.

My late father was a lover of ingenious things, a pack rat, a tinkerer, an envisioner of possibilities. I always thought I was very like him in many ways, but not in that one.

Above is the "before" photo. I gave the Capitol DeLuxe a good cleaning yesterday (using my new vacuum attachments! and a lot of Tri-Flow oil), but this is how it appeared in the wild. For $20, I received fifty-some pounds worth of machine, a foot control, a battered-looking yet extremely sturdy base and case, 15 pattern cams, a ruffler, various feet and the usual complement of dusty thread and rusty pins.

I'm still figuring things out, as no manual came with the machine, and there are some mysterious moves that must be made with various levers and dials for simple operations such as changing from straight stitch to zig zag.

But does this one ever run. Yes, it goes through lots of layers of canvas without a hitch, and doubtless sews thick leather and soda cans and whatever else people show their machines doing on eBay, but that's not really the main thing. I detect almost no vibration or hesitation whatsoever. The machine is completely responsive, from a very low speed to top speed.

And can you believe the paint color and the design?

Friday, August 28, 2009

Rose Top from Ottobre Woman 2/2007

I have purchased a grand total of one Ottobre Woman magazine, and I would guess that I've made between 12 and 14 garments from it. Mostly variations on the six t-shirts in this issue, but also a pair of jeans. Looking through the issue to write a review for Pattern Review, I recall that I intend to make the #12 basic A-line skirt and the #18 rain jacket. This magazine is a great value and I ought to buy another.

The Rose Top (#5) is the most successful garment I've made from this issue overall. It is a knit top with woven, interfaced bands at the v-neck and sleeve hems. I love the combination of comfort (and easy care) with the structure of the woven facings. My first version of this top (now sadly worn out) was from a lightweight (really rather flimsy) knit in the most beautiful shade of teal blue. I interfaced the knit and used the self fabric for the facings, which worked out wonderfully.


As you can see, this version is a bit more exuberant! The Hilco knit came from Banberry Place, which seems to have the largest selection of European knits available online in the U.S. Bunte Fabrics is another source. These Hilco knits remind me of a wonderful t-shirt I once purchased from Oilily. I adored the print (even though it wasn't my best color) and it lasted for several years. When I make a top that I like, I wear it often, and probably hard. It's sad to say goodbye after only a few months, which often happens, even with relatively expensive knits. These European cotton-lycra knits are the answer!


I'll Never Buy Canned Air Again! I Hope.

Has it occurred to you that canned air is...air? And that it costs at least $6 a can? And that this can doesn't last long at all? These facts have worried me, and I have used this expensive air very stingily. But as I've slowly morphed into a sewing machine geek, I find myself offended at the slightest bits of lint and dust on any of my machines. eBay seller Vacuum Stop offers this set of "micro vacuum attachments" for $9.95 plus $4.95 shipping, and points out that it would be useful for electronic equipment. And how about detailing cars? Dusting antique dolls? Reaching the crevices in your toaster? The mind boggles.


But for me and my house, we will keep this set in the sewing room. Where it will join with the hose of any regular vacuum and completely remove dust and lint from the inner reaches of sewing machines and sergers. And where it will fill me with a feeling of deep satisfaction, knowing that the dust has been sucked out, rather than simply blown around.