

When I was a kid, Halloween was a low-hoopla affair all the way around. The culture was less focused on the "holiday", and that was compounded for me by living in a rural area (with no hope of pedestrian trick-or-treaters). I don't remember dressing up or going house-to-house at all past the age of eight. Even when I did go, my costumes were very last-minute productions, involving a drugstore witch hat and rubber bat.
Last year my husband had a brilliant costume idea for our Halloween swing dance, and we ended up winning the costume contest. That positive reinforcement must be the new element that has resulted in my feeling much more enthusiasm for dressing up this year (though I have declared myself ineligible for the contest).
I had planned to wait until after Halloween to blog about my costume-making, but then I thought, "Wait, who cares about Halloween costumes right after Halloween?" So I decided to chat about a few of the elements of my costume, in case they are of any help to folks in the throes of their own costuming efforts.
While I am declaring myself to be a bit of a convert to costume making, I do still retain plenty of skepticism about the time, money and effort it requires. Multiple trips to Joann Fabrics, Hancock Fabrics and the local Foam & Fabrics are not my idea of the most productive way to spend my time, and yet I definitely am guilty of taking such trips over the last week.
A further hangup is that any costume I wear must be reasonably modest and comfortable. No short skirts, bustiers or tragic shoes. With those parameters in mind, my costume theme is "Swing Dance Wonder Woman," an idea I must have originally gotten from this wonderful Lady Skater version by the pattern's designer, Kitchy Coo:
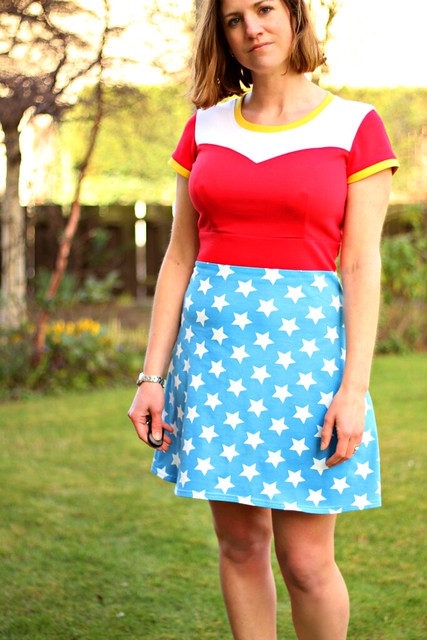
For my version, I combined the Lady Skater with McCall's 6435 knit sweetheart top. At first I used nude fabric for the yoke, to better mimic the strapless bustier from the TV show, but the nude fabric looked unflattering around my face, so I made another bodice with a white yoke.
For the skirt, I originally planned to order printed star fabric (like my inspiration), but then foolishly decided that I wanted my stars to be more like Wonder Woman's: spaced more densely toward the waist and then stopping before the lower edge of the garment.

I toyed with the idea of making the stars vary in size like in this version of Wonder Woman's costume. I cut out a full-size copy of the skirt in freezer paper and used templates of different-sized stars to trace the design. I planned to cut out each star with an Exacto knife, iron the freezer paper onto the fabric and stencil the all-over design in acrylic paint. With the whole skirt pattern spread out in front of me, I realized that so much cutting would put my wrist tendonitis into full-fledged uproar and scrapped that plan.
Instead, I purchased a Fiskars large star punch from Joanns. I don't know whether to praise or heckle the thing: it was invaluable for my purpose, but very temperamental and difficult to use. Halfway through the project it got too dull to punch any more stars, and I had to exchange it for another one. And yes, I did search the web for how to sharpen it and tried those tricks, but to not-good-enough effect. Anyway, I made little star cut-outs, then arranged them somewhat randomly, denser toward the waist and gradually becoming further apart toward the hem, ironed them on and stenciled. It took two coats of paint to get a nice bright white for the stars.
 |
| Fiskars XL Star Punch, here making the star for the crown |
In the meanwhile, I made the accessories. Right away I rejected the idea of copying the eagle over Wonder Woman's boobs, reasoning that, without that element, the dress can be worn on the Fourth of July or another patriotic occasion. Also, for crying out loud--too much work!
For the belt, cuffs and the crown, I found a wonderful gold-coated denim at Hancock's. That fabric was great to work with, since it has some substance to it, sews easily and isn't scratchy like so many metallic fabrics can be. I didn't do much experimenting with pressing this fabric, preferring instead to use understitching and copious amounts of double-stick adhesive tape (more on this in a moment) to hold it in place. It seemed to me that the possibility of discoloring the metal finish was high, even though the denim fabric itself could stand up to pressing.
The belt needed an adjustable closure at the back to accommodate weight fluctuations or different degrees of comfortable-ness. A simple laced back seemed to be the best solution, even though the belt was not very wide at that point. I do think it could be a little shorter, to provide a greater range of sizes, but it's fine. Also, I felt the belt would need at least a little boning in addition to its inner layer of stiff interfacing, to prevent it from folding over at the center front. It would have been just as easy to sew the channels for the boning on the inner side of the belt, and thus to have them invisible from the right side, but I decided a few lines of stitching would be more flattering on my not-tiny waist than a single unbroken expanse of shiny gold.

In general, the process for the gold accessories was to sketch a shape in my notebook, measure the area of the body where the item would sit and then draft a simple pattern.
To sew the belt, a stiff interfacing, cut to the finished size of the belt (i.e., without seam allowances) was first applied to the wrong side of the outer fabric piece. I used a fusible hair canvas, which was really too costly of a material for use in a costume, but it was the only stiff material I had on hand in a sufficiently long cut to make in one piece. After the interfacing was basted into place, I transferred the markings I had added to my paper pattern to the interfacing and sewed channels for the boning. Then I machine-stitched the top edges of the outer and inner fabrics right sides together, and understitched the seam allowances to the back. At that point I sewed the short back edges together, then trimmed the seams and turned the belt right side out. At this point the boning was inserted into the channels, trimmed to sit inside the seam allowances at the bottom edge. In another fabric, the lower edges might have been topstitched together, but I thought that a more invisible method of joining would look better in this case.
Here was one of the many places I used and was grateful all over again for a notion that isn't widely used in the garment sewing space, Jodees's Sealah Tape. This stuff is an incredibly sticky, release-paper-backed adhesive that can be used in place of glue, hot glue or petroleum-based cements. It is amazing because it is easy to control and it bonds things instantly and permanently, with no drying time required. You do not want to stitch through it, because it will immediately gum up your needle. I like the absence of fumes and, again, the immediacy. Apply, burnish, remove the paper liner, press the surfaces together and move on to the next step.


The inner layer of the cuffs is a stiff Peltex interfacing, with quilted lines 1/2" apart. Using the Sealah tape, I turned the edges of the fabric to the inside of the cuff, notching the curved edges to allow them to follow the edge smoothly. Then elastic loops were adhered to another layer of Sealah, and then the whole back side of the piece was covered with a piece of suede (recycled from a large thrift store suede jacket) using Sealah tape around the edges and craft glue (like Sobo) in the center. I did press this under a weight for a few hours to make sure all the layers would adhere together.
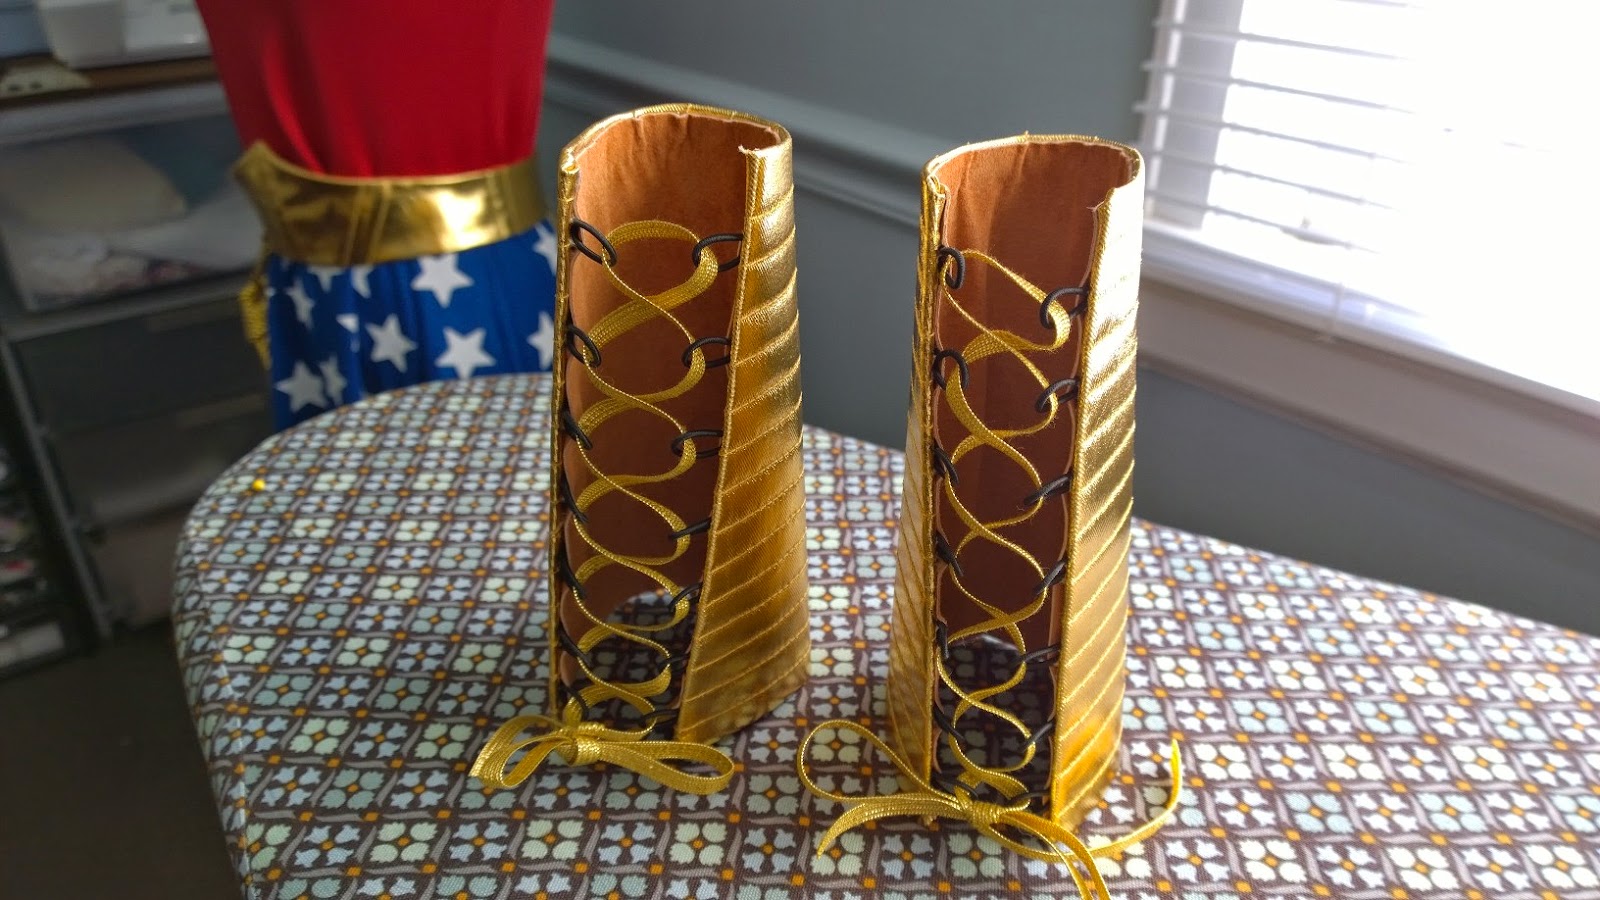
Eyelets or grommets would have been another solution for lacing the cuffs, but I didn't have enough of the proper size in gold, and I couldn't face another run to the store for yet another notion. I think the elastic loops will work fine and they have enough give to allow me to slip the already-laced up cuff over my arm.
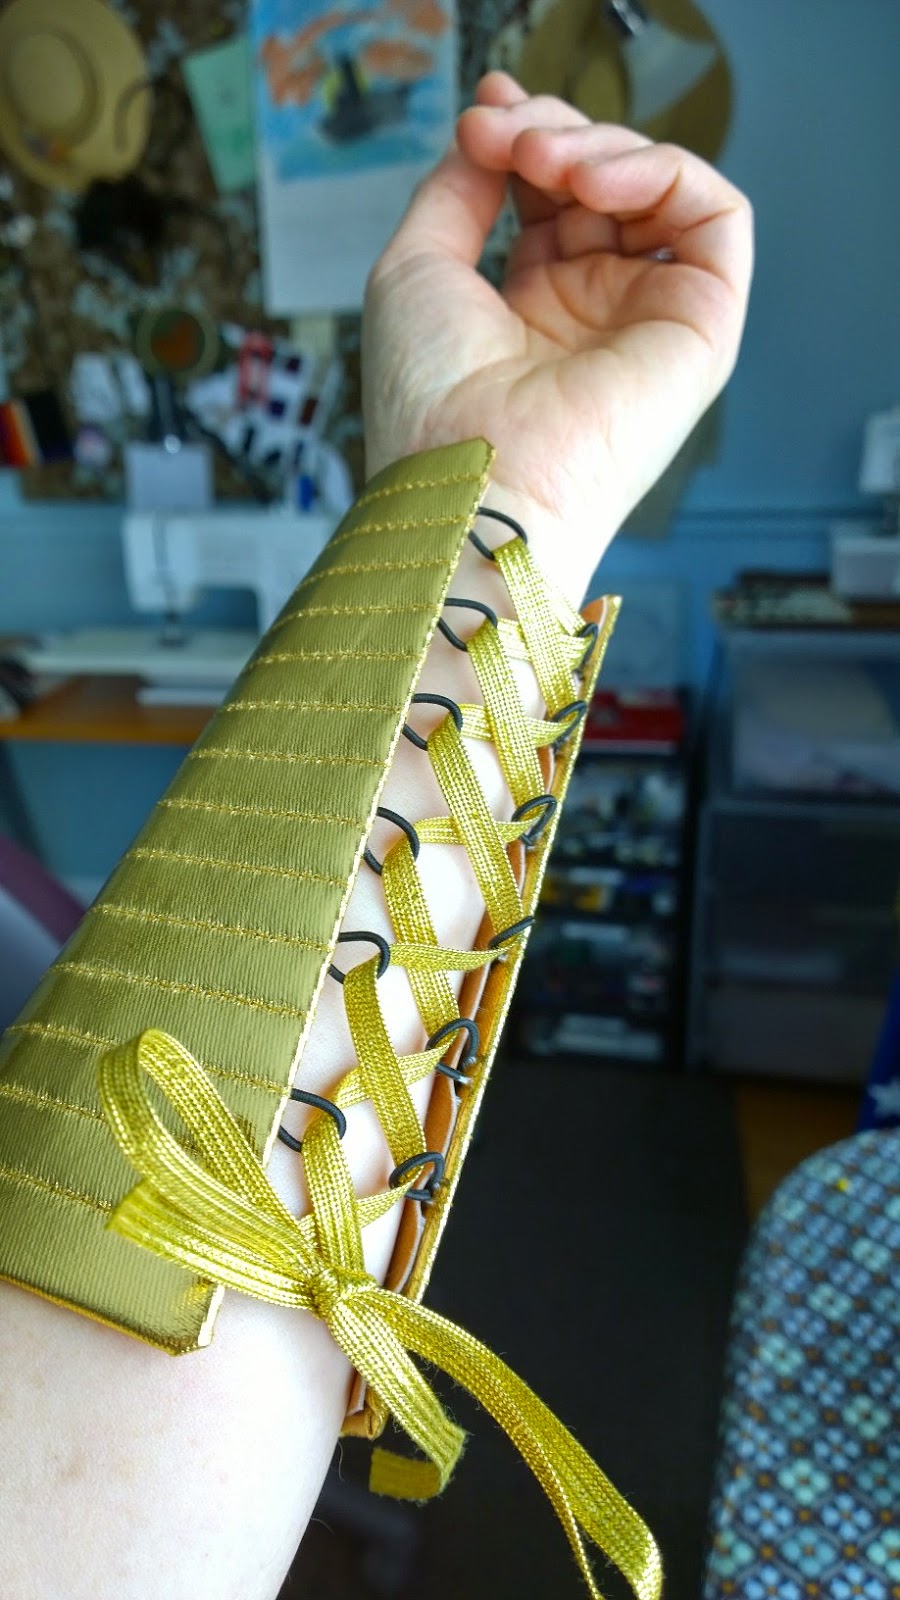
I got a bit carried away with the length of the cuffs. Wonder Woman's are shorter, but I reckon I'll be able to deflect even more bullets and death rays with longer ones.


In the photo above, which is a repeat from earlier in the post, you can see the small elastic loops at the back side of the crown. I will use these to mount either a comb on each side or bobby pins. The crown actually stays put pretty well on its own, because it is so very lightweight, which suits my comfort requirement perfectly!

How are your costumes coming along?!!
Thankfully, I don't intend to get involved in anything Halloween-y this year! It wasn't a big deal at all when I was a kid, trick or treating was just something Charlie Brown and his friends did in Peanuts, no one really knew what it was here in the UK. It's taken off here now, of course, and is a highly commercialised money-spinning venture, which I dislike.
ReplyDeleteThat said, I am not averse to some dressing up, and your Amish costumes last year were inspired! This year's Wonder Woman is equally fantastic, although goodness, what a lot of work! You'd better win again after all that time and effort! I love the dress, and the armlets are brilliant, you could deflect anything and everything with those!
And boots as well? Can't wait to see you wearing the whole ensemble. xxx
I can't wait to see you all decked out!
ReplyDeleteI love your costume, it's the details that really make it. Hope you win again!
ReplyDeleteMy favourite costume as a child was the one that involved rollers and dressing up as Hilda Ogden, a character from a soap in the UK, if you google her you will have a laugh. I would not have the patience. I really love the level of details in the skirt, that is so cool, as are the accessories. You are going to win this year too I feel !
ReplyDeleteWow! Very, very impressive. I do hope that you will show a picture of you in the costume at a later date!
ReplyDeleteHi, I'm very impressed with your Swing Dance Wonder Woman -- my husband and I also swing dance, and it seems like I'm forever having to come up with costumes several times a year to participate in the contests they have. Where are you? I'm in the Bay Area, south of San Francisco.
ReplyDeleteWhat shoe size and dress size is the custome, Can I buy it from you, it is absolutely stunning!
ReplyDelete